| Oracle® Database 2 Day + Data Replication and Integration Guide 11g Release 2 (11.2) E17516-08 |
|
|
PDF · Mobi · ePub |
| Oracle® Database 2 Day + Data Replication and Integration Guide 11g Release 2 (11.2) E17516-08 |
|
|
PDF · Mobi · ePub |
This chapter describes extending an Oracle Streams replication environment by adding database objects or databases.
This chapter contains the following sections:
See Also:
Sometimes it is necessary to extend an Oracle Streams replication environment when the needs of your organization change. You can extend an Oracle Streams replication environment by adding database objects or databases.
There are two ways to extend an Oracle Streams replication environment:
Use the Setup Streams Replication Wizard or a Single Configuration Procedure
Add the Oracle Streams Components Individually in Multiple Steps
Use the Setup Streams Replication Wizard or a Single Configuration Procedure
You can extend an Oracle Streams Replication environment using one of the following methods if the environment satisfies certain conditions:
Run the Setup Streams Replication Wizard in Oracle Enterprise Manager
Run one of the following procedures in the DBMS_STREAMS_ADM package:
The MAINTAIN_GLOBAL procedure can add a new database to an environment that replicates changes to all of the database objects in the databases.
The MAINTAIN_SCHEMAS procedure can add one or more new schemas to the existing databases in the replication environment, or it can add a new database that replicates schemas that are currently being replicated.
The MAINTAIN_SIMPLE_TTS procedure can add a new simple tablespace to an existing replication environment, or it can add a new database that replicates a simple tablespace that is currently being replicated.
The MAINTAIN_TABLES procedure can add one or more new tables to the existing databases in the replication environment, or it can add a new database that replicates tables that are currently being replicated.
The MAINTAIN_TTS procedure can add a new set of tablespaces to an existing replication environment, or it can add a new database that replicates a set of tablespaces that are currently being replicated.
To use the wizard or one of the procedures to extend an Oracle Streams replication environment, the environment must satisfy the following conditions:
It must be a two-database or hub-and-spoke replication environment that was configured by the Setup Streams Replication Wizard or one of the configuration procedures in the DBMS_STREAMS_ADM package. See "About the Common Types of Oracle Streams Replication Environments" for information about these types of replication environments.
It cannot use a synchronous capture at any database in the Oracle Streams replication environment. See "About Change Capture with a Synchronous Capture" for more information about synchronous capture.
If you are adding a database to the environment, then each database that captures changes must use a local capture process. No database can use a downstream capture process. If you are adding one or more database objects to the environment, then the databases can use either local or downstream capture processes. See "About Change Capture with a Capture Process" for more information about downstream capture.
If you are adding database objects to the replication environment, then the database objects must exist at the database where you run the wizard or at the database specified in the source_database parameter of a configuration procedure.
If your replication environment meets these conditions, then you can use the Setup Streams Replication Wizard or a single procedure to extend the environment.
The following are additional requirements for cases in which the replicated database objects exist at an intended destination database before you run the wizard or procedure:
If you are adding database objects to the replication environment, and one or more of these database objects exist at a database other than the source database, then meet the following requirements:
Before running the wizard or procedure, ensure that the replicated database objects at each destination database are consistent with replicated database objects at the source database.
After running the wizard or procedure, ensure that the instantiation SCN is set for each replicated database object at each destination database. See Oracle Streams Replication Administrator's Guide for information about monitoring and setting instantiation SCNs.
If you are adding a database to the replication environment, and any of the database objects that are replicated in the current environment exist at the added database, then meet the following requirements:
Before running the wizard or procedure, ensure that the replicated database objects at each database being added are consistent with replicated database objects at the source database.
After running the wizard or procedure, ensure that the instantiation SCN is set for each replicated database object at the added database. See Oracle Streams Replication Administrator's Guide for information about monitoring and setting instantiation SCNs.
For instructions about adding to a replication environment using the wizard, see the following topics:
For instructions about adding to a replication environment using a single procedure, see Oracle Streams Replication Administrator's Guide.
Add the Oracle Streams Components Individually in Multiple Steps
If you cannot extend the Oracle Streams replication environment by using the Setup Streams Replication Wizard or a configuration procedure in the DBMS_STREAMS_ADM package, then you must complete the configuration steps manually. These steps include adding the necessary rules and Oracle Streams components to the environment, and other configuration steps.
If you must extend the Oracle Streams replication environment manually, then see the instructions in Oracle Streams Replication Administrator's Guide.
See Also:
Oracle Database PL/SQL Packages and Types Reference for information about the procedures in the DBMS_STREAMS_ADM chapter
This topic includes an example that uses the Setup Streams Replication Wizard in Oracle Enterprise Manager to add tables to an existing hub-and-spoke replication environment. When the example is complete, the Oracle Streams replication environment replicates the changes made to the added tables at the databases in the environment.
Specifically, the example in this topic extends the replication environment configured in "Tutorial: Configuring Hub-and-Spoke Replication with Local Capture Processes". That configuration has the following characteristics:
The hr schema is replicated at the hub.example.com, spoke1.example.com, and spoke2.example.com databases.
The hub.example.com database is the hub database in the hub-and-spoke environment, while the other databases are the spoke databases.
The spoke databases allow changes to the replicated schema, and each database has a local capture process to capture these changes.
Update conflict handlers are configured for each replicated table at each database to resolve conflicts
This example adds the following tables to the environment:
oe.orders
oe.order_items
This example uses the tables in the oe sample schema. The oe sample schema is installed by default with Oracle Database.
Note:
Before you use the Setup Streams Replication Wizard to extend an Oracle Streams replication environment, ensure that the environment meets the conditions described in "About Extending an Oracle Streams Replication Environment".To add database objects to an Oracle Streams replication environment:
Stop the capture process at the hub database in the hub-and-spoke environment.
In this example, stop the capture process at the hub.example.com database. The replicated database objects can remain open to changes while the capture process is stopped. These changes will be captured when the capture process is restarted.
In Oracle Enterprise Manager, log in to the hub database as the Oracle Streams administrator.
Go to the Database Home page.
Under High Availability, click the number link in Streams Components.
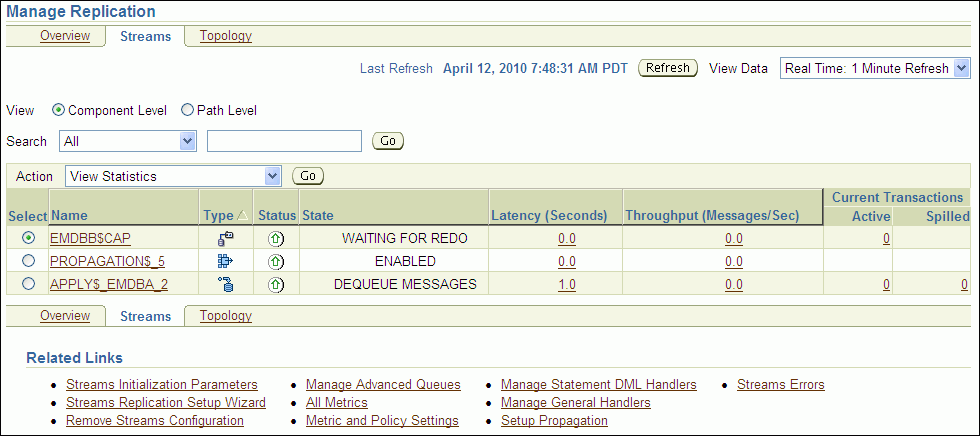
The Manage Replication page appears, showing the Overview subpage.
Click Streams to open the Streams subpage.
Select the capture process to stop. If necessary, use the search tool to find the capture process, and then select it.
Select Disable in Action.
Click Go.
Click Yes on the confirmation page to stop the capture process.
Note:
You can also use theDBMS_CAPTURE_ADM.STOP_CAPTURE procedure to stop a capture process.While still connected to the hub database as the Oracle Streams administrator in Oracle Enterprise Manager, go to the Database Home page for the database instance.
Click Data Movement to open the Data Movement subpage.
Click Setup in the Streams section.
The Streams page appears, showing the setup options.
Select Replicate Tables in Setup Streams Replication.
In the Host Credentials section, enter the username and password for an administrative user on the host computer system.
Click Continue.
On the Object Selection page, click Add to open the Select Table page.
Use the search tools to display the oe.orders and oe.order_items tables, and select these tables.
For example, to display these tables, enter oe in the Schema field and click Go.
Click Select. The Object Selection page displays the oe.orders and oe.order_items tables.
Click Next.
On the Destination Options page, identify the spoke database spoke1.example.com by specifying its host name, port, SID or service name, and Oracle Streams administrator credentials.
(When you configure replication with the spoke2.example.com database, identify spoke2.example.com.)
Click Next.
Complete the Replication Options page:
In the Directory Path section, leave the directory paths for the source and destination database unchanged if the host user you specified in Step 6 can read from and write to the directories and the directories have enough space for a Data Pump export dump file. Otherwise, specify different directory paths, or create directory objects that meet these requirements and specify those.
Expand Advanced Options.
In the Options section, ensure that Capture, Propagate and Apply data manipulation language (DML) changes is selected.
If you do not want to replicate DDL changes, then deselect Capture, Propagate and Apply data definition language (DDL) changes.
Select Setup Bi-directional replication.
In the Capture Process section, enter capture_hns in Capture Name.
In the Propagation Process section, enter propagation_spoke1 in Propagation Name. (When you configure replication with the spoke2.example.com database, enter propagation_spoke2.)
In the Apply Process section, enter apply_spoke1 in Apply Name. (When you configure replication with the spoke2.example.com database, enter apply_spoke2.)
Click Next.
On the Schedule Job page, either select Immediately or specify a time for the job to run later.
Click Next.
On the Review page, review the configuration information and click Submit.
On the Confirmation page, optionally click the job link to monitor the job.
When the job is running, information about its progress is recorded in the following data dictionary views: DBA_RECOVERABLE_SCRIPT, DBA_RECOVERABLE_SCRIPT_PARAMS, DBA_RECOVERABLE_SCRIPT_BLOCKS, and DBA_RECOVERABLE_SCRIPT_ERRORS. If the job stops because it encounters an error, then see Oracle Streams Replication Administrator's Guide for instructions about using the RECOVER_OPERATION procedure in the DBMS_STREAMS_ADM package to recover from these errors.
While still connected as the Oracle Streams administrator to the hub database, complete Steps 1 to 19 again. However, in Step 12, on the Destination Options page, identify the spoke database spoke2.example.com by specifying its host name, port, SID or service name, and Oracle Streams administrator credentials.
Also, in Step 14g, enter propagation_spoke2 in Propagation Name, and in Step 14h, enter apply_spoke2 in Apply Name
Set the instantiation SCN for the replicated tables at the spoke databases:
Note:
This step is required in this example because the replicated tables existed at the spoke databases before the wizard was run. If the replicated tables did not exist at the spoke databases before the wizard was run, then the wizard sets the instantiation SCN for the replicated tables, and this step is not required. Ensure that the data in the shared table is consistent at the source and destination databases when the instantiation SCN is set and that no changes are made to the table at the source database until after the SCN that is used for the instantiation SCN.In SQL*Plus, connect to the hub.example.com database as the Oracle Streams administrator.
See Oracle Database Administrator's Guide for information about connecting to a database in SQL*Plus.
Set the instantiation SCN for the oe.orders table at the spoke1.example.com database:
DECLARE
  iscn  NUMBER;    -- Variable to hold instantiation SCN value
BEGIN
  iscn := DBMS_FLASHBACK.GET_SYSTEM_CHANGE_NUMBER();
  DBMS_APPLY_ADM.SET_TABLE_INSTANTIATION_SCN@spoke1.example.com(
    source_object_name    => 'oe.orders',
    source_database_name  => 'hub.example.com',
    instantiation_scn     => iscn);
END;
/
Set the instantiation SCN for the oe.order_items table at the spoke1.example.com database:
DECLARE
  iscn  NUMBER;    -- Variable to hold instantiation SCN value
BEGIN
  iscn := DBMS_FLASHBACK.GET_SYSTEM_CHANGE_NUMBER();
  DBMS_APPLY_ADM.SET_TABLE_INSTANTIATION_SCN@spoke1.example.com(
    source_object_name    => 'oe.order_items',
    source_database_name  => 'hub.example.com',
    instantiation_scn     => iscn);
END;
/
Set the instantiation SCN for the oe.orders table at the spoke2.example.com database:
DECLARE
  iscn  NUMBER;    -- Variable to hold instantiation SCN value
BEGIN
  iscn := DBMS_FLASHBACK.GET_SYSTEM_CHANGE_NUMBER();
  DBMS_APPLY_ADM.SET_TABLE_INSTANTIATION_SCN@spoke2.example.com(
    source_object_name    => 'oe.orders',
    source_database_name  => 'hub.example.com',
    instantiation_scn     => iscn);
END;
/
Set the instantiation SCN for the oe.order_items table at the spoke2.example.com database:
DECLARE
  iscn  NUMBER;    -- Variable to hold instantiation SCN value
BEGIN
  iscn := DBMS_FLASHBACK.GET_SYSTEM_CHANGE_NUMBER();
  DBMS_APPLY_ADM.SET_TABLE_INSTANTIATION_SCN@spoke2.example.com(
    source_object_name    => 'oe.order_items',
    source_database_name  => 'hub.example.com',
    instantiation_scn     => iscn);
END;
/
Configure latest time conflict resolution for the orders and order_items tables in the oe schema at the hub.example.com, spoke1.example.com, and spoke2.example.com databases. See "Tutorial: Configuring Latest Time Conflict Resolution for a Table" for instructions.
This topic includes an example that uses the Setup Streams Replication Wizard in Oracle Enterprise Manager to add a new spoke database to an existing hub-and-spoke replication environment. When the example is complete, the Oracle Streams replication environment replicates the changes made to the schema with the new database.
Specifically, the example in this topic extends the replication environment configured in "Tutorial: Configuring Hub-and-Spoke Replication with Local Capture Processes". That configuration has the following characteristics:
The hr schema is replicated at the hub.example.com, spoke1.example.com, and spoke2.example.com databases.
The hub.example.com database is the hub database in the hub-and-spoke environment, while the other databases are the spoke databases.
The spoke databases allow changes to the replicated schema, and each database has a local capture process to capture these changes.
This example adds the spoke3.example.com database to the environment.
Note:
Before you use the Setup Streams Replication Wizard to extend an Oracle Streams replication environment, ensure that the environment meets the conditions described in "About Extending an Oracle Streams Replication Environment".To add a database to an existing Oracle Streams replication environment:
Complete the following tasks to prepare the environment for the new database:
Configure network connectivity so that the hub database can communicate with the new spoke database. In this example, configure network connectivity so that the hub.example.com database and the spoke3.example.com databases can communicate with each other.
See Oracle Database 2 Day DBA for information about configuring network connectivity between databases.
Configure an Oracle Streams administrator at the new spoke database. In this example, configure an Oracle Streams administrator at the spoke3.example.com database. See "Tutorial: Configuring an Oracle Streams Administrator" for instructions. This example assumes that the Oracle Streams administrator is strmadmin.
Set initialization parameters properly at the new spoke database. In this example, set initialization parameters properly at the spoke3.example.com database. See "Preparing for Oracle Streams Replication" for instructions.
Configure the new spoke database to run in ARCHIVELOG mode. For a capture process to capture changes generated at a source database, the source database must be running in ARCHIVELOG mode. In this example, configure the spoke3.example.com database to run in ARCHIVELOG mode. See Oracle Database Administrator's Guide for information about configuring a database to run in ARCHIVELOG mode.
Stop the capture process at the hub database in the hub-and-spoke environment.
In this example, stop the capture process at the hub.example.com database. The replicated database objects can remain open to changes while the capture process is stopped. These changes will be captured when the capture process is restarted.
In Oracle Enterprise Manager, log in to the hub database as the Oracle Streams administrator.
Go to the Database Home page.
Under High Availability, click the number link in Streams Components.
The Manage Replication page appears, showing the Overview subpage.
Click Streams to open the Streams subpage.
Select the capture process to stop. If necessary, use the search tool to find the capture process, and then select it.
Select Disable in Action.
Click Go.
Click Yes on the confirmation page to stop the capture process.
Note:
You can also use theDBMS_CAPTURE_ADM.STOP_CAPTURE procedure to stop a capture process.While still connected to the hub database as the Oracle Streams administrator in Oracle Enterprise Manager, go to the Database Home page for the database instance.
Click Data Movement to open the Data Movement subpage.
Click Setup in the Streams section.
The Streams page appears, showing the setup options.
Select Replicate Schemas in Setup Streams Replication.
In the Host Credentials section, enter the username and password for an administrative user on the host computer system.
Click Continue.
On the Object Selection page, select HR and click Next.
On the Destination Options page, identify the spoke database spoke3.example.com by specifying its host name, port, SID or service name, and Oracle Streams administrator credentials.
Click Next.
Complete the Replication Options page:
In the Directory Path section, leave the directory paths for the source and destination database unchanged if the host user you specified in Step 7 can read from and write to the directories and the directories have enough space for a Data Pump export dump file. Otherwise, specify different directory paths, or create directory objects that meet these requirements and specify those.
Expand Advanced Options.
In the Options section, ensure that Capture, Propagate and Apply data manipulation language (DML) changes is selected.
If you do not want to replicate DDL changes, then deselect Capture, Propagate and Apply data definition language (DDL) changes.
Select Setup Bi-directional replication.
In the Capture Process section, enter capture_hns in Capture Name.
In the Propagation Process section, enter propagation_spoke3 in Propagation Name.
In the Apply Process section, enter apply_spoke3 in Apply Name.
Click Next.
On the Schedule Job page, either select Immediately or specify a time for the job to run later.
Click Next.
On the Review page, review the configuration information and click Submit.
On the Confirmation page, optionally click the job link to monitor the job.
When the job is running, information about its progress is recorded in the following data dictionary views: DBA_RECOVERABLE_SCRIPT, DBA_RECOVERABLE_SCRIPT_PARAMS, DBA_RECOVERABLE_SCRIPT_BLOCKS, and DBA_RECOVERABLE_SCRIPT_ERRORS. If the job stops because it encounters an error, then see Oracle Streams Replication Administrator's Guide for instructions about using the RECOVER_OPERATION procedure in the DBMS_STREAMS_ADM package to recover from these errors.
Configure latest time conflict resolution for all of the tables in the hr schema at the spoke3.example.com database. This schema includes the countries, departments, employees, jobs, job_history, locations, and regions tables. "Tutorial: Configuring Latest Time Conflict Resolution for a Table" for instructions.
|
Copyright © 2007, 2011, Oracle and/or its affiliates. All rights reserved. Legal Notices |
|