| Pro*C/C++ Getting Started 10g Release 2 (10.2) for Microsoft Windows (32-Bit) Part Number B14321-01 |
|
|
PDF · Mobi · ePub |
| Pro*C/C++ Getting Started 10g Release 2 (10.2) for Microsoft Windows (32-Bit) Part Number B14321-01 |
|
|
PDF · Mobi · ePub |
This appendix describes how to integrate Pro*C/C++ into the Microsoft Visual C++ integrated development environment.
This appendix contains these topics:
This section describes how to fully integrate Pro*C/C++ within Microsoft Visual C++ projects.
All the precompiler errors and warnings are displayed in the output box where Microsoft Visual C++ displays compiler and linker messages. You do not have to precompile a file separately from the Microsoft Visual C++ build environment. More importantly, Microsoft Visual C++ maintains the dependencies between .c and .pc files. Microsoft Visual C++ maintains the dependency and precompile files, if needed.
All of the procedures in this section are performed within Microsoft Visual C++.
For Microsoft Visual C++ to run Pro*C/C++, it must know the location of the Pro*C/C++ executable. If Microsoft Visual C++ was installed before any Oracle release 9.2 products were installed, then you must add the directory path.
To specify the location of the Pro*C/C++ executable:
Select Options from the Tools menu.
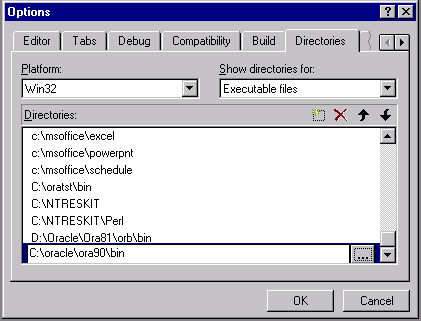
The Options dialog appears.
Click the Directories tab.
Select Executable files from Show directories For.
Scroll to the bottom of the Directories box and click the dotted rectangle.
Enter the ORACLE_BASE\ORACLE_HOME\bin directory. For example:
C:\oracle\ora92\bin
Click OK.

To specify the location of the Pro*C/C++ header files:
Select Options from the Tools menu. The Options dialog appears.
Click the Directories tab.
Select Include Files from the Show Directories For list.
Scroll to the bottom of the Directories box and click the dotted rectangle.
Enter the ORACLE_BASE\ORACLE_HOME\precomp\public directory. For example:
C:\oracle\ora92\precomp\public
Click OK.
After you create a project, you need to add the .pc files.
To add a .pc file to a project:
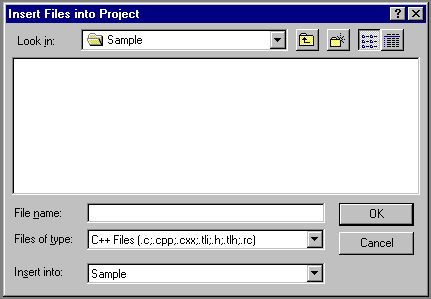
Select Add To Project from the Project menu and then select Files. The Insert Files into Project dialog appears.

Select All Files from the Files list.
Select the .pc file.
Click OK.
For each .pc file, you need to add a reference to the .c file that will result from precompiling.
To add a reference to a .c file to a project:
Select Add To Project from the Project menu, and then select Files. The Insert Files into Project dialog appears.
Type the name of the .c file in the File Name box.
Click OK. Because the .c file has not been created yet, Microsoft Visual C++ displays the following message: "The specified file does not exist. Do you want to add a reference to the project anyway?"
Click Yes.
Pro*C/C++ applications must link with the library file orasql10.lib.
To add the Pro*C/C++ library to a project:

To specify Custom Build options:
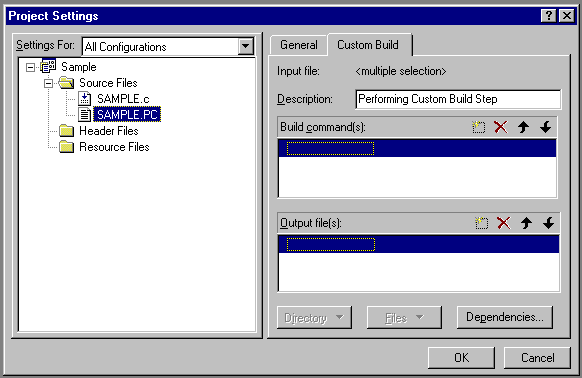
In FileView, right-click a .pc file and select Settings. The Project Settings dialog appears with the Custom Build tab displayed.
In the Build commands box, on one line, set the build to use the same hardcoded path as that of the $ORACLE_HOME setting.
In the Output files box, enter one of the following:
If you are generating .c files, then enter $(ProjDir)\$(InputName).c.
If you are generating .cpp files, then enter $(ProjDir)\$(InputName).cpp.
$(ProjDir) and $MSDEVDIR are macros for custom build commands in Microsoft Visual C++. When the project is built, Microsoft Visual C++ checks the date of the output files to determine whether they need to be rebuilt for any new modifications made to the source code.
Click OK.
See Also:
Microsoft Visual C++ documentation
You can include Pro*C/C++ as a choice in the Tools menu of Microsoft Visual C++.
To add Pro*C/C++ to the Tools menu:
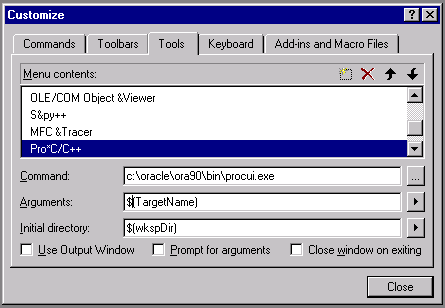
From within Microsoft Visual C++, select Customize from the Tools menu. The Customize dialog appears.
Click the Tools tab.
Scroll to the bottom of the Menu contents box and click the dotted rectangle.
Enter the following text:
Pro*C/C++
In the Command box, type the path and filename of the graphical Pro*C/C++ executable, or use the Browse button to the right of the box to select the file name. For example:
C:\oracle\ora92\bin\procui.exe
In the Arguments box, enter the following text:
$(TargetName)
When you select Pro*C/C++ from the Tools menu, Microsoft Visual C++ uses the $(TargetName) argument to pass the name of the current development project to Pro*C/C++. Pro*C/C++ then opens a precompile project with the same name as the opened project, but with a .pre extension in the project directory.
In the Initial directory box, enter the following text:
$(WkspDir)
The Customize dialog should now look like the following graphic (although the Oracle home directory may be different on your computer).
Click Close. Microsoft Visual C++ adds Pro*C/C++ to the Tools menu.