| Oracle® Data Mining Administrator's Guide 10g Release 2 (10.2) Part Number B14338-02 |
|
|
PDF · Mobi · ePub |
| Oracle® Data Mining Administrator's Guide 10g Release 2 (10.2) Part Number B14338-02 |
|
|
PDF · Mobi · ePub |
Oracle provides two tools to assist analysts in data mining activities: Oracle Data Miner and Oracle Spreadsheet Add-In for Predictive Analytics.
Users must have the database and object permissions described in Chapter 2 to use these tools.
Note:
Oracle Data Mining also supports PL/SQL and Java APIs. Application developers can use these APIs to create their own data mining tools. The data mining APIs are documented in Oracle Data Mining Application Developer's Guide.This chapter contains the following topics:
Oracle Data Miner is a graphical user interface for Oracle Data Mining. Oracle Data Miner's easy-to-use wizards guide you through the data preparation, data mining, model evaluation, and model scoring process.
Oracle Data Miner is supported on Windows 2000, Windows XP Professional Edition, and Linux.
To install Oracle Data Miner on a Microsoft Windows platform, take these steps:
Download Oracle Data Miner 10.2 from the Oracle Web site at http://www.oracle.com/technology/products/bi/odm/index.html.
Open the ZIP file and extract all files to an empty directory (such as C:\ODMINER). Be sure to use folder names so that the files retain their original organization in subfolders.
Create a Windows shortcut to BIN\ODMINERW.EXE, and drag the shortcut to your Windows desktop for easy access.
Follow these instructions for installing Oracle Data Miner on Linux.
Oracle Data Miner requires Java 1.4.2, which is installed with Oracle Database and Oracle Client. If you are installing Oracle Data Miner on a computer where neither of these products is installed, then check the Java version with this command at the operating system prompt:
java -version
If Java 1.4.2 is not already installed, you can download it from http://www.java.com.
To install Oracle Data Miner on a Linux or Unix platform, take these steps:
Download Oracle Data Miner from the Oracle Web site at http://www.oracle.com/technology/products/bi/odm/index.html.
Open the ZIP file and extract all files to an empty directory. The following command creates a directory named odminer and inflates the files into it.
unzip odminer.zip -d odminer
Grant execution permission to bin/odminer with a command such as this:
chmod +x odminer/bin/odminer
Run the odminer executable from the bin subdirectory.
chmod odminer/bin
odminer
To create a connection from Oracle Data Miner to Oracle Database, take these steps:
Open Oracle Data Miner.
On the Oracle Data Miner dialog box, click New.
On the New Connection dialog box, enter the information for connecting to Oracle Database.
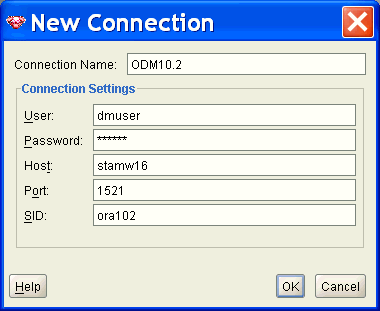
The new connection will appear in the Oracle Data Miner dialog box, where you can use it to connect to Oracle Database.
The following figure shows the main page of Oracle Data Miner after opening a new connection.
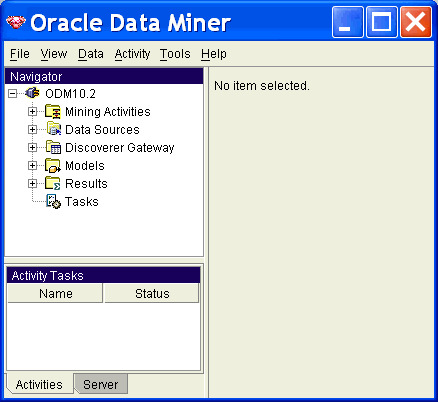
For documentation to assist you in using Oracle Data Miner, see the online help. Refer also to Oracle Data Mining Concepts.
The Oracle Spreadsheet Add-In for Predictive Analytics adds predictive analytics features to Microsoft Excel. Using simple "one click" Predict and Explain predictive analytics operations, Excel users can mine data stored in Excel or in Oracle Database.
Predictive analytics provide automated methodologies that simplify data mining. Using Predictive Analytics, many more users can harness the power of Oracle Data Mining without possessing the knowledge of advanced data analysts.
The Spreadsheet Add-In requires several components on your PC:
The Spreadsheet Add-In also requires access to an instance of Oracle Database installed with the Data Mining option.
Before you can use the Spreadsheet Add-In, you must take several steps to prepare your PC:
Install the Add-In in Excel. See "Adding the Spreadsheet Add-In to Excel".
Install Oracle Client. This process includes the installation of Oracle Objects for OLE and Oracle Net Configuration Assistant, both of which are required by the Add-In. See "Installing Oracle Client".
Create an Oracle Net Service Name to manage the connection between the client and Oracle Database. See "Creating an Oracle Net Service Name".
To install the Spreadsheet Add-In on your personal computer, take these steps:
Download the Spreadsheet Add-In for Predictive Analysis from the Oracle Web site at http://www.oracle.com/technology/products/bi/odm/index.html.
Open the ZIP file and extract the file named Predictive_Analytics.xla to the Microsoft Office Library directory. The library has a path such as this one:
C:\Program Files\Microsoft Office\Office\Library
Note:
If the scriptsdbmsdmpa.sql, prvtdmpa.plb, and Predictive_Analytics_Demo.sql are included in the ZIP file, you can disregard them. These scripts are used with Oracle Database 10.1; they cannot be used with Oracle Database 10g Release 2 (10.2).Open Excel and click Tools > Add-Ins.
Select Oracle Predictive Analytics from the Add-Ins dialog box, as shown in the following figure.
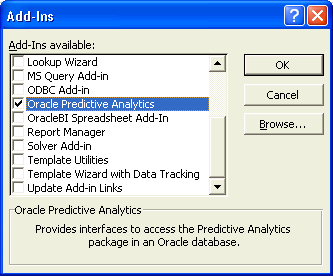
The OraclePA menu is added to the Excel toolbar.
Oracle Spreadsheet Add-In for Predictive Analytics requires the presence of Oracle Objects for OLE. To obtain this component, you must install Oracle Client on the computer where Excel and the Spreadsheet Add-In are installed.
Use the following steps to install Oracle Client on a Windows platform:
Logon as Administrator.
From the Client installation directory, run SETUP.EXE.
Oracle Universal Installer opens and displays the Welcome page. Click Next.
On the Select Installation Type page, choose Administrator and click Next.
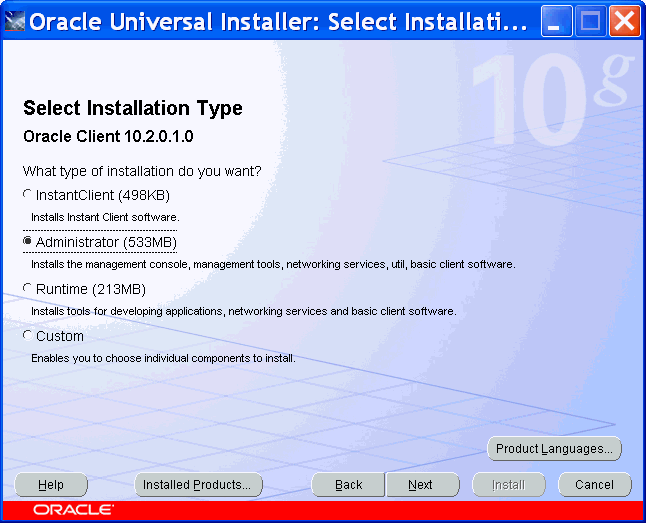
On the Specify Home Details page, provide the path of a home directory for the Oracle Client installation.
On the Product-Specific Prerequisite page, verify that all checks succeeded. If any checks failed, then you must correct the problem before proceeding.
On the Summary page, click the Install button.
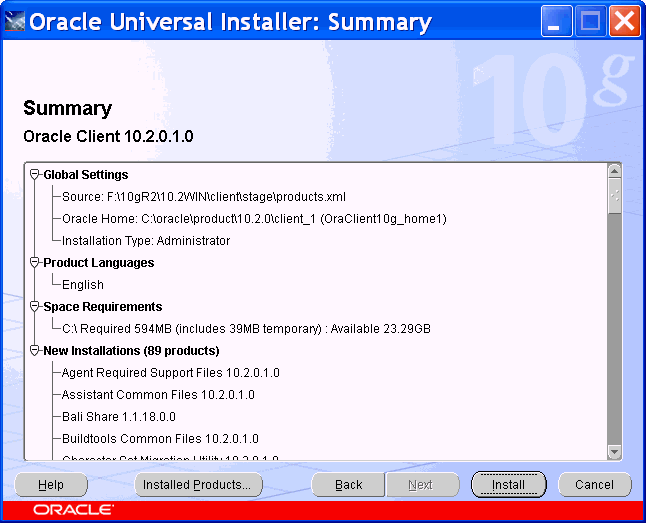
The Installer displays the progress of the installation. When you click Next, the Configuration Assistants page is displayed.
Oracle Net Configuration Assistant starts and displays the Welcome page. Choose Perform Typical Configuration.
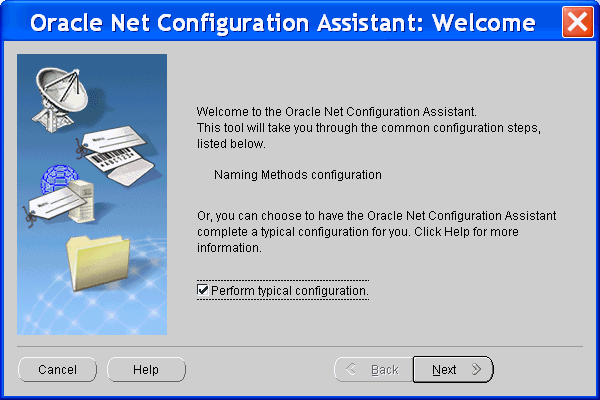
Oracle Net Configuration Assistant creates a simple connection using the Easy Connect naming method. This method enables clients to connect to a remote database server without any configuration. Clients specify a SQL CONNECT statement using a simple TCP/IP address, identified by a host name and an optional port number and service name.
CONNECT username/password@host[:port][/servicename]
When the Oracle Net Configuration process is complete, click Finish.
The Spreadsheet Add-In requires an Oracle Net Service Name to identify the connection between Excel and Oracle Database.
Note:
The Spreadsheet Add-In uses features of Oracle Data Mining in Oracle Database Enterprise Edition. Whether the data to be mined is stored in Excel or in Oracle Database, an Oracle Net Service Name is required for accessing the data mining functionality.The database connection used by the Spreadsheet Add-In must identify a database user that has been configured for data mining. Most of the privileges needed for data mining are also needed for predictive analytics. See "Creating Users".
You can define the Net Service Name during installation of Oracle Client. "Installing Oracle Client" illustrates the Easy Connect naming method.
Alternatively, you can use Oracle Net Configuration Assistant to create a Net Service Name. In either case, you will need to know the host name, the service name of the database instance, and the port number to create the Net Service Name. To use Oracle Net Configuration Assistant, follow the procedure described in "Local Database" and specify the host, service name, and port of the remote database service.
You can install Oracle Database and Oracle Client on a single computer. You might do this if you wish to experiment with Oracle Data Mining on your personal computer or demonstrate Oracle Data Mining on a laptop.
When the Oracle Database is local, you still need to create a Net Service Name for the Spreadsheet Add-In. Follow these steps on a Windows platform:
Open Oracle Net Configuration Assistant. Click Start > Programs > Oracle-– oracle_client_home > Configuration and Migration Tools > Net Configuration Assistant.
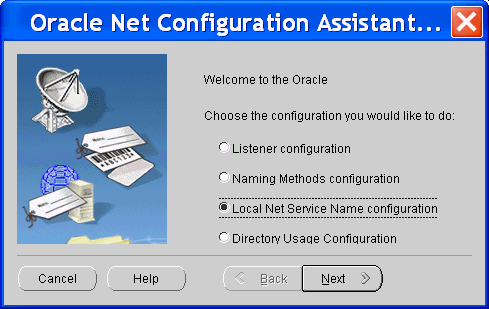
On the Welcome page, select Local Net Service Name configuration.
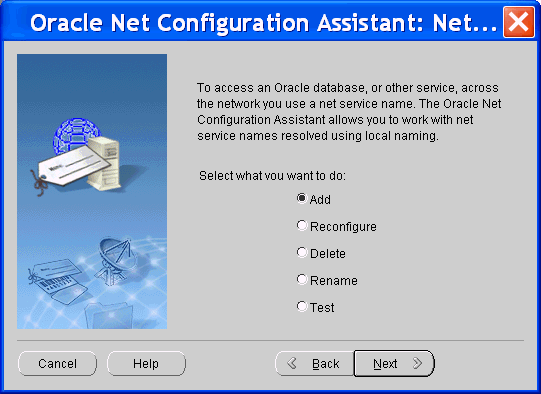
On the Net Service Name Configuration page, select Add.
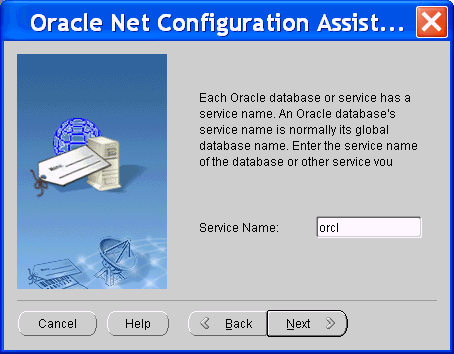
On the Service Name page, type the service name of the database instance.
On the Select Protocols page, select TCP.
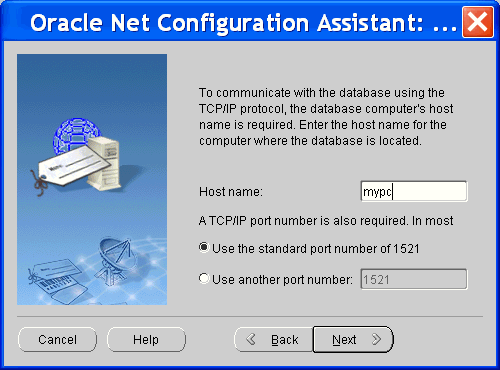
On the TCP/IP Protocol page, provide the name of the host computer where Oracle Database is installed and the port number.
On the Test page, select Yes, perform a test.
If the test fails, select Change Login and provide your own database user name and password. You will not see this page if the default SYSTEM user name and password can successfully make a connection.
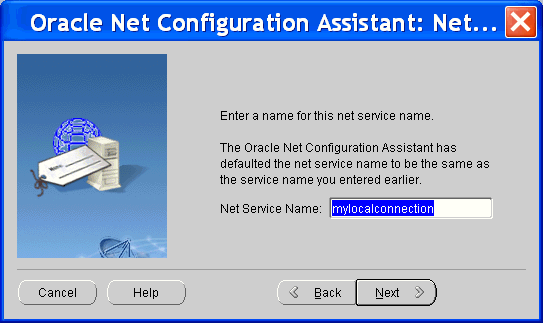
On the Net Service Name page, type a descriptive name to identify the connection to the database server.
You will choose this name when connecting to Oracle Database from Excel.
Click Next.
On the next page, choose No if you wish to exit the Net Configuration Assistant. Navigate through the final pages until you see the Finish button.
Once you have created an Oracle Net Service Name for the instance of Oracle Database you plan to use, you can start using the Spreadsheet Add-In. You will specify the Net Service Name to connect the Add-In to Oracle Database. To make a connection, take these steps:
In Excel, click OraclePA > Connect.
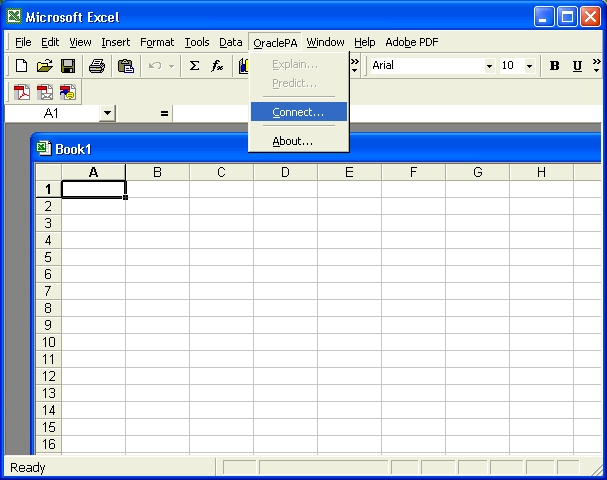
On the Connect dialog box, select a service name from the drop-down list, and type in your database user name and password.